Creating a Market
This guide walks you through the full process of creating a binary prediction market on CloudBank.
Prerequisites
- A Web3 wallet (e.g., MetaMask) connected to BSC Testnet.
- USDC balance available for seed liquidity.
- A clear, verifiable YES/NO question for your market.
Step 1 — Navigate to Create Market
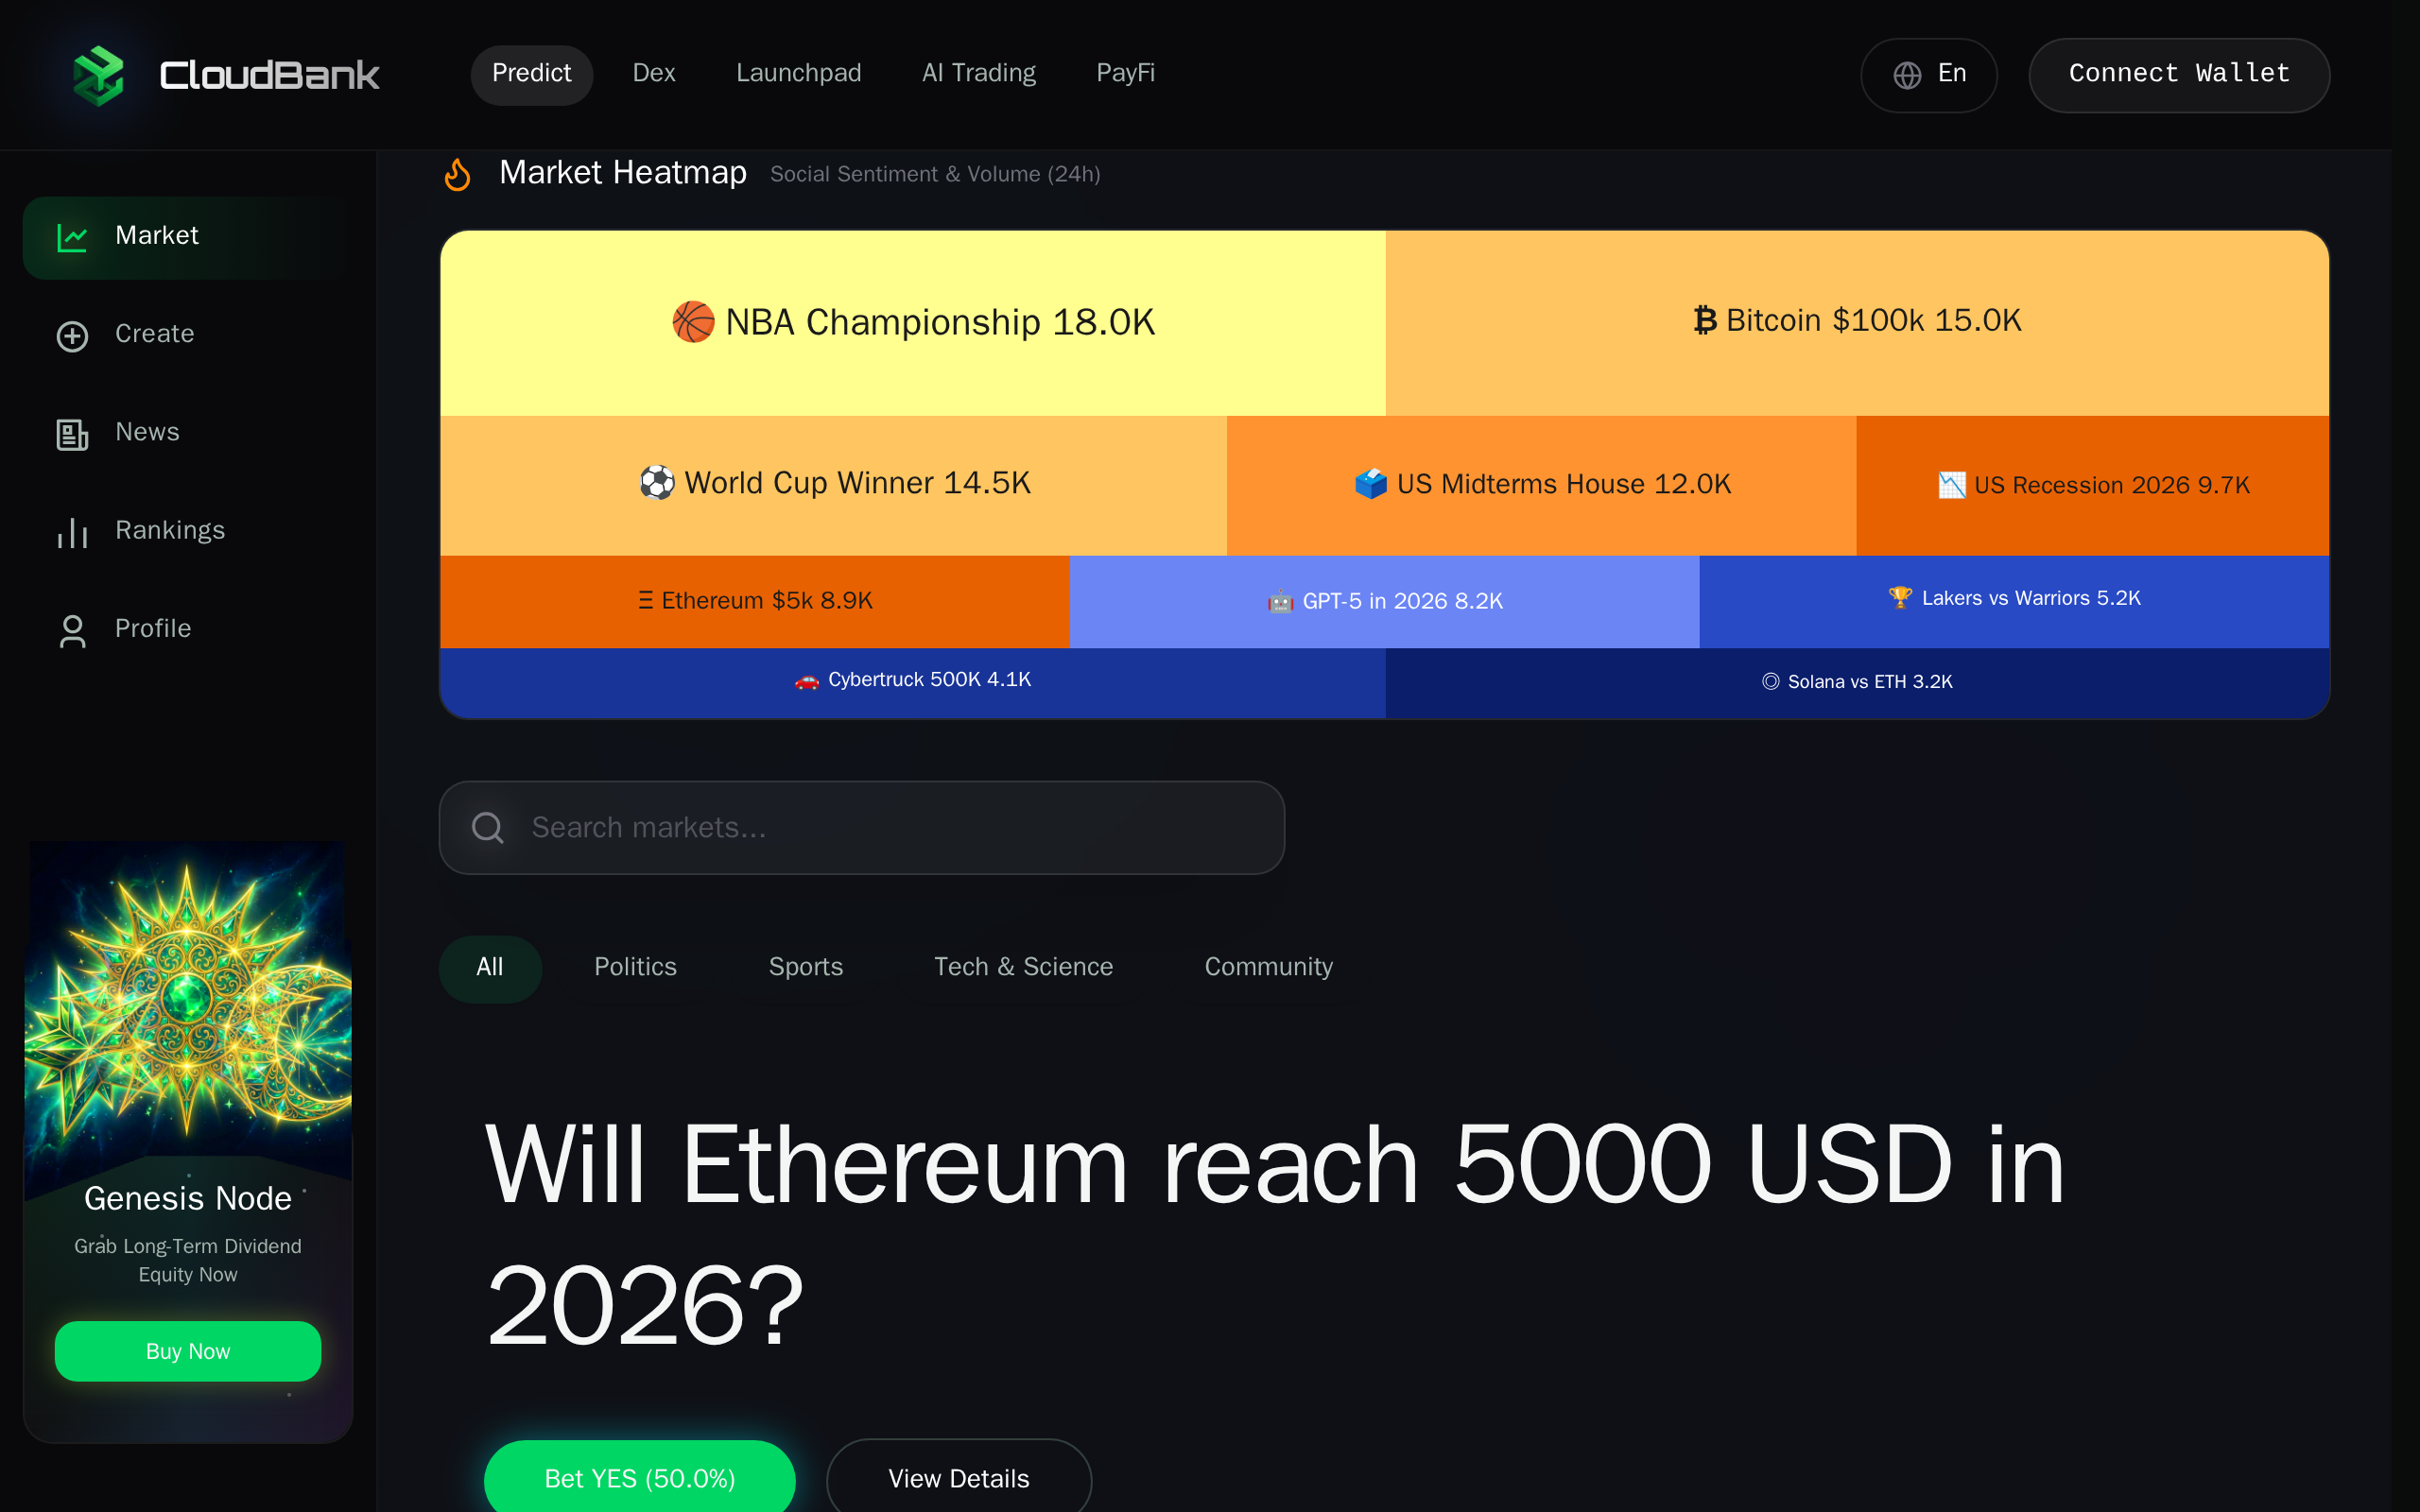
Open the CloudBank app and click Create in the left sidebar (or the bottom navigation bar on mobile).
Step 2 — Create New Market Form
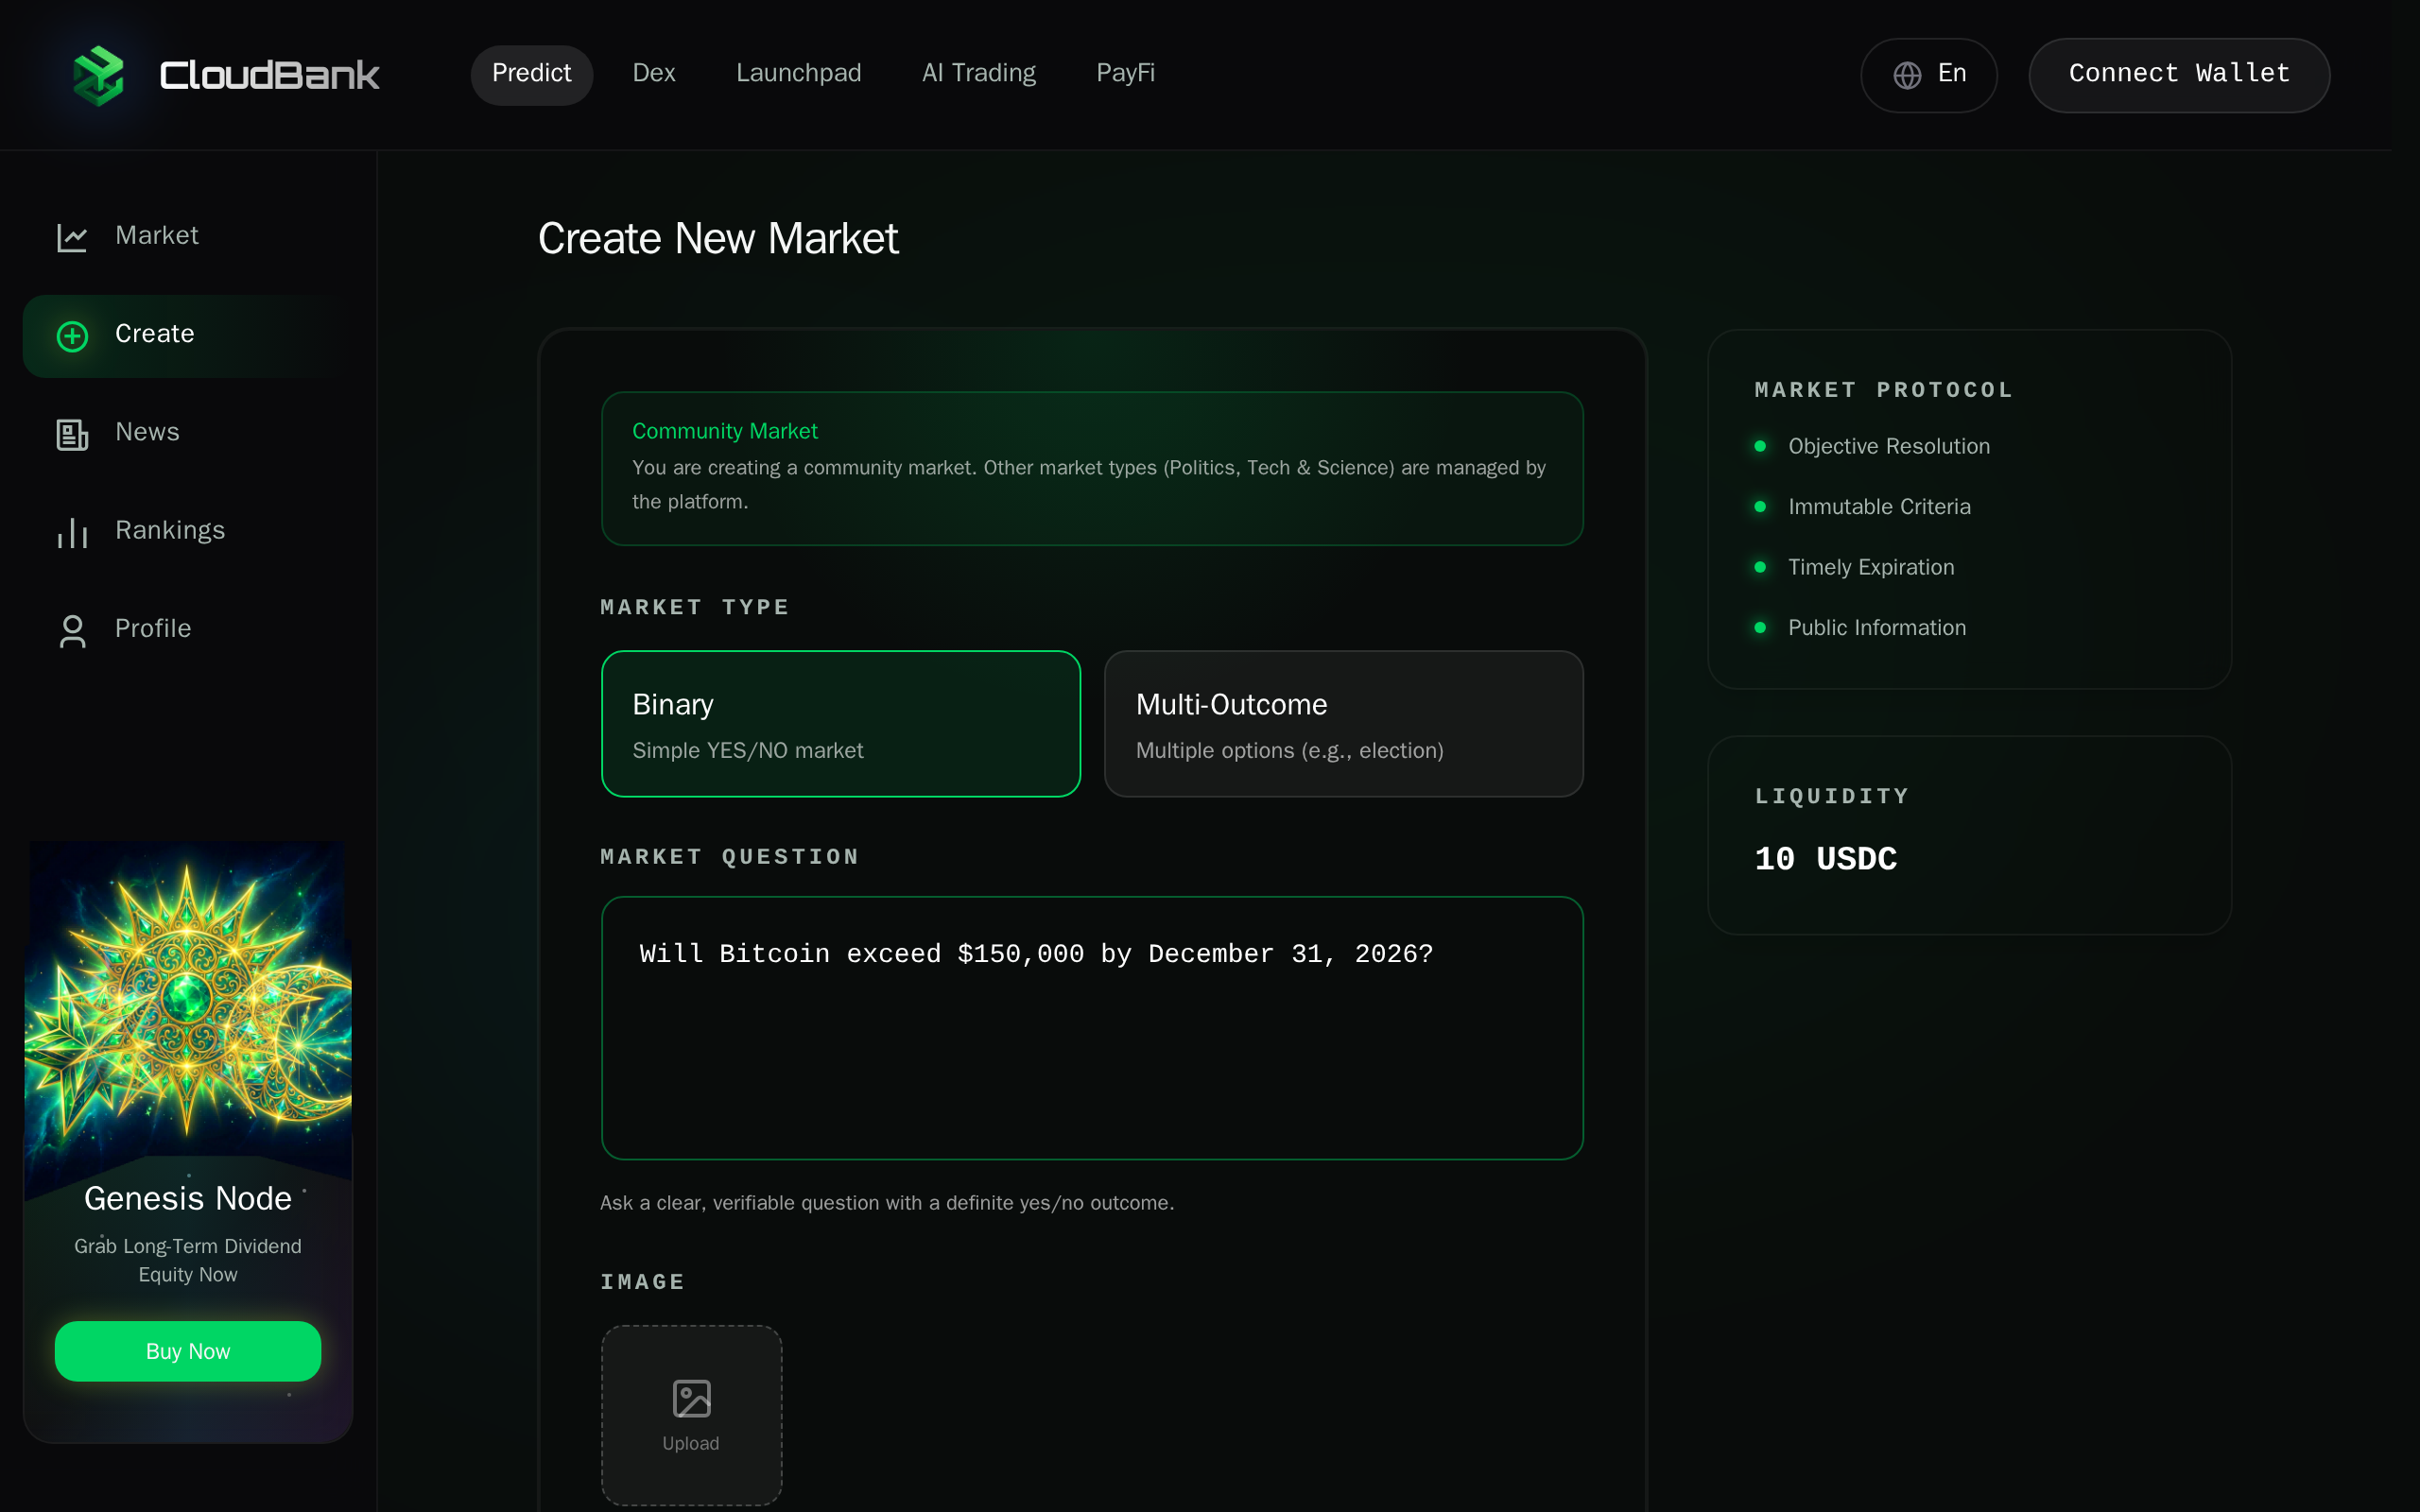
The Create New Market page opens with the form on the left and the Market Protocol summary on the right. The protocol panel reminds you of the four quality principles:
- Objective Resolution — the outcome must be deterministic.
- Immutable Criteria — the rules cannot change after creation.
- Timely Expiration — a realistic deadline must be set.
- Public Information — the resolution source must be publicly verifiable.

Step 3 — Choose Market Type
Select the market type. Two options are available:
| Type | Description |
|---|---|
| Binary | Simple YES/NO market — the default choice for most questions. |
| Multi-Outcome | Multiple options (e.g., election candidates, sports teams). |
For this guide we use Binary, which is selected by default.

Step 4 — Enter the Market Question
Type your question in the Market Question text area. The question should be clear and have a definite yes/no outcome.
Good examples:
- "Will Bitcoin exceed $150,000 by December 31, 2026?"
- "Will SpaceX launch Starship to orbit before July 2026?"
Bad examples:
- "Is Bitcoin good?" (subjective)
- "What will happen next?" (ambiguous)
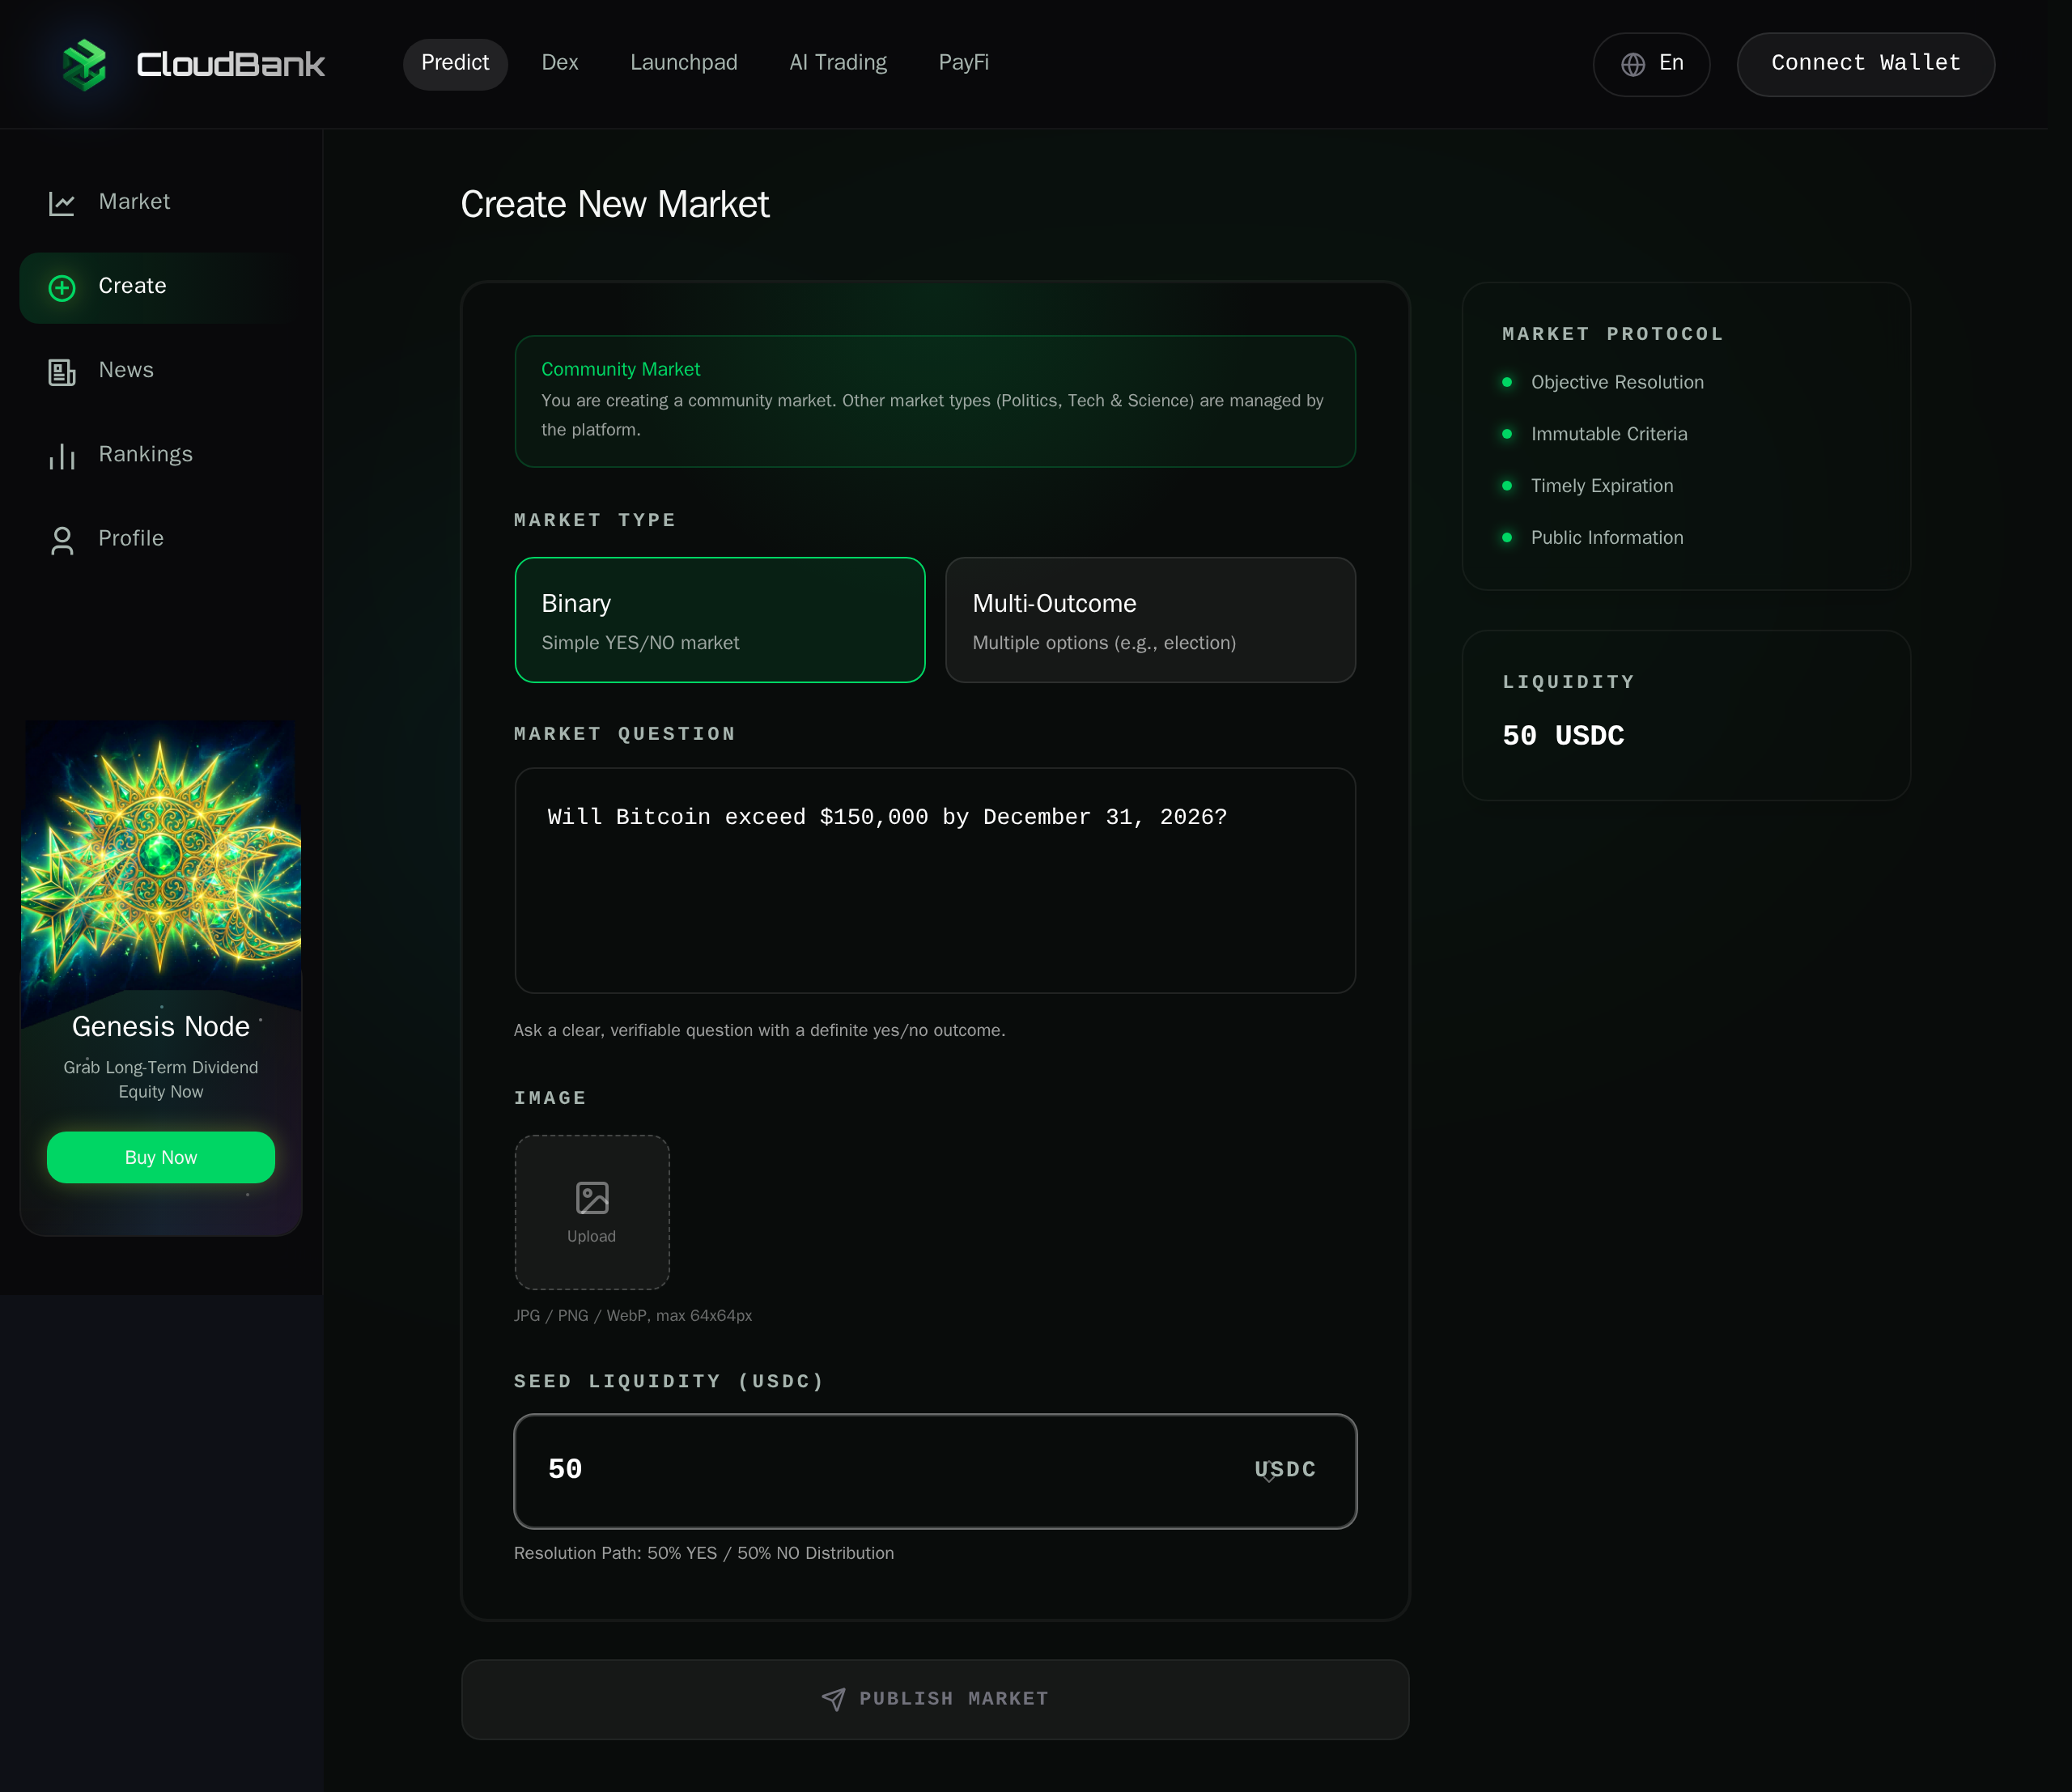
Step 5 — Upload Image (Optional)
You can optionally upload a cover image for your market. Accepted formats are JPG, PNG, or WebP, with a maximum size of 64x64px. This image appears on the market card in the list view.
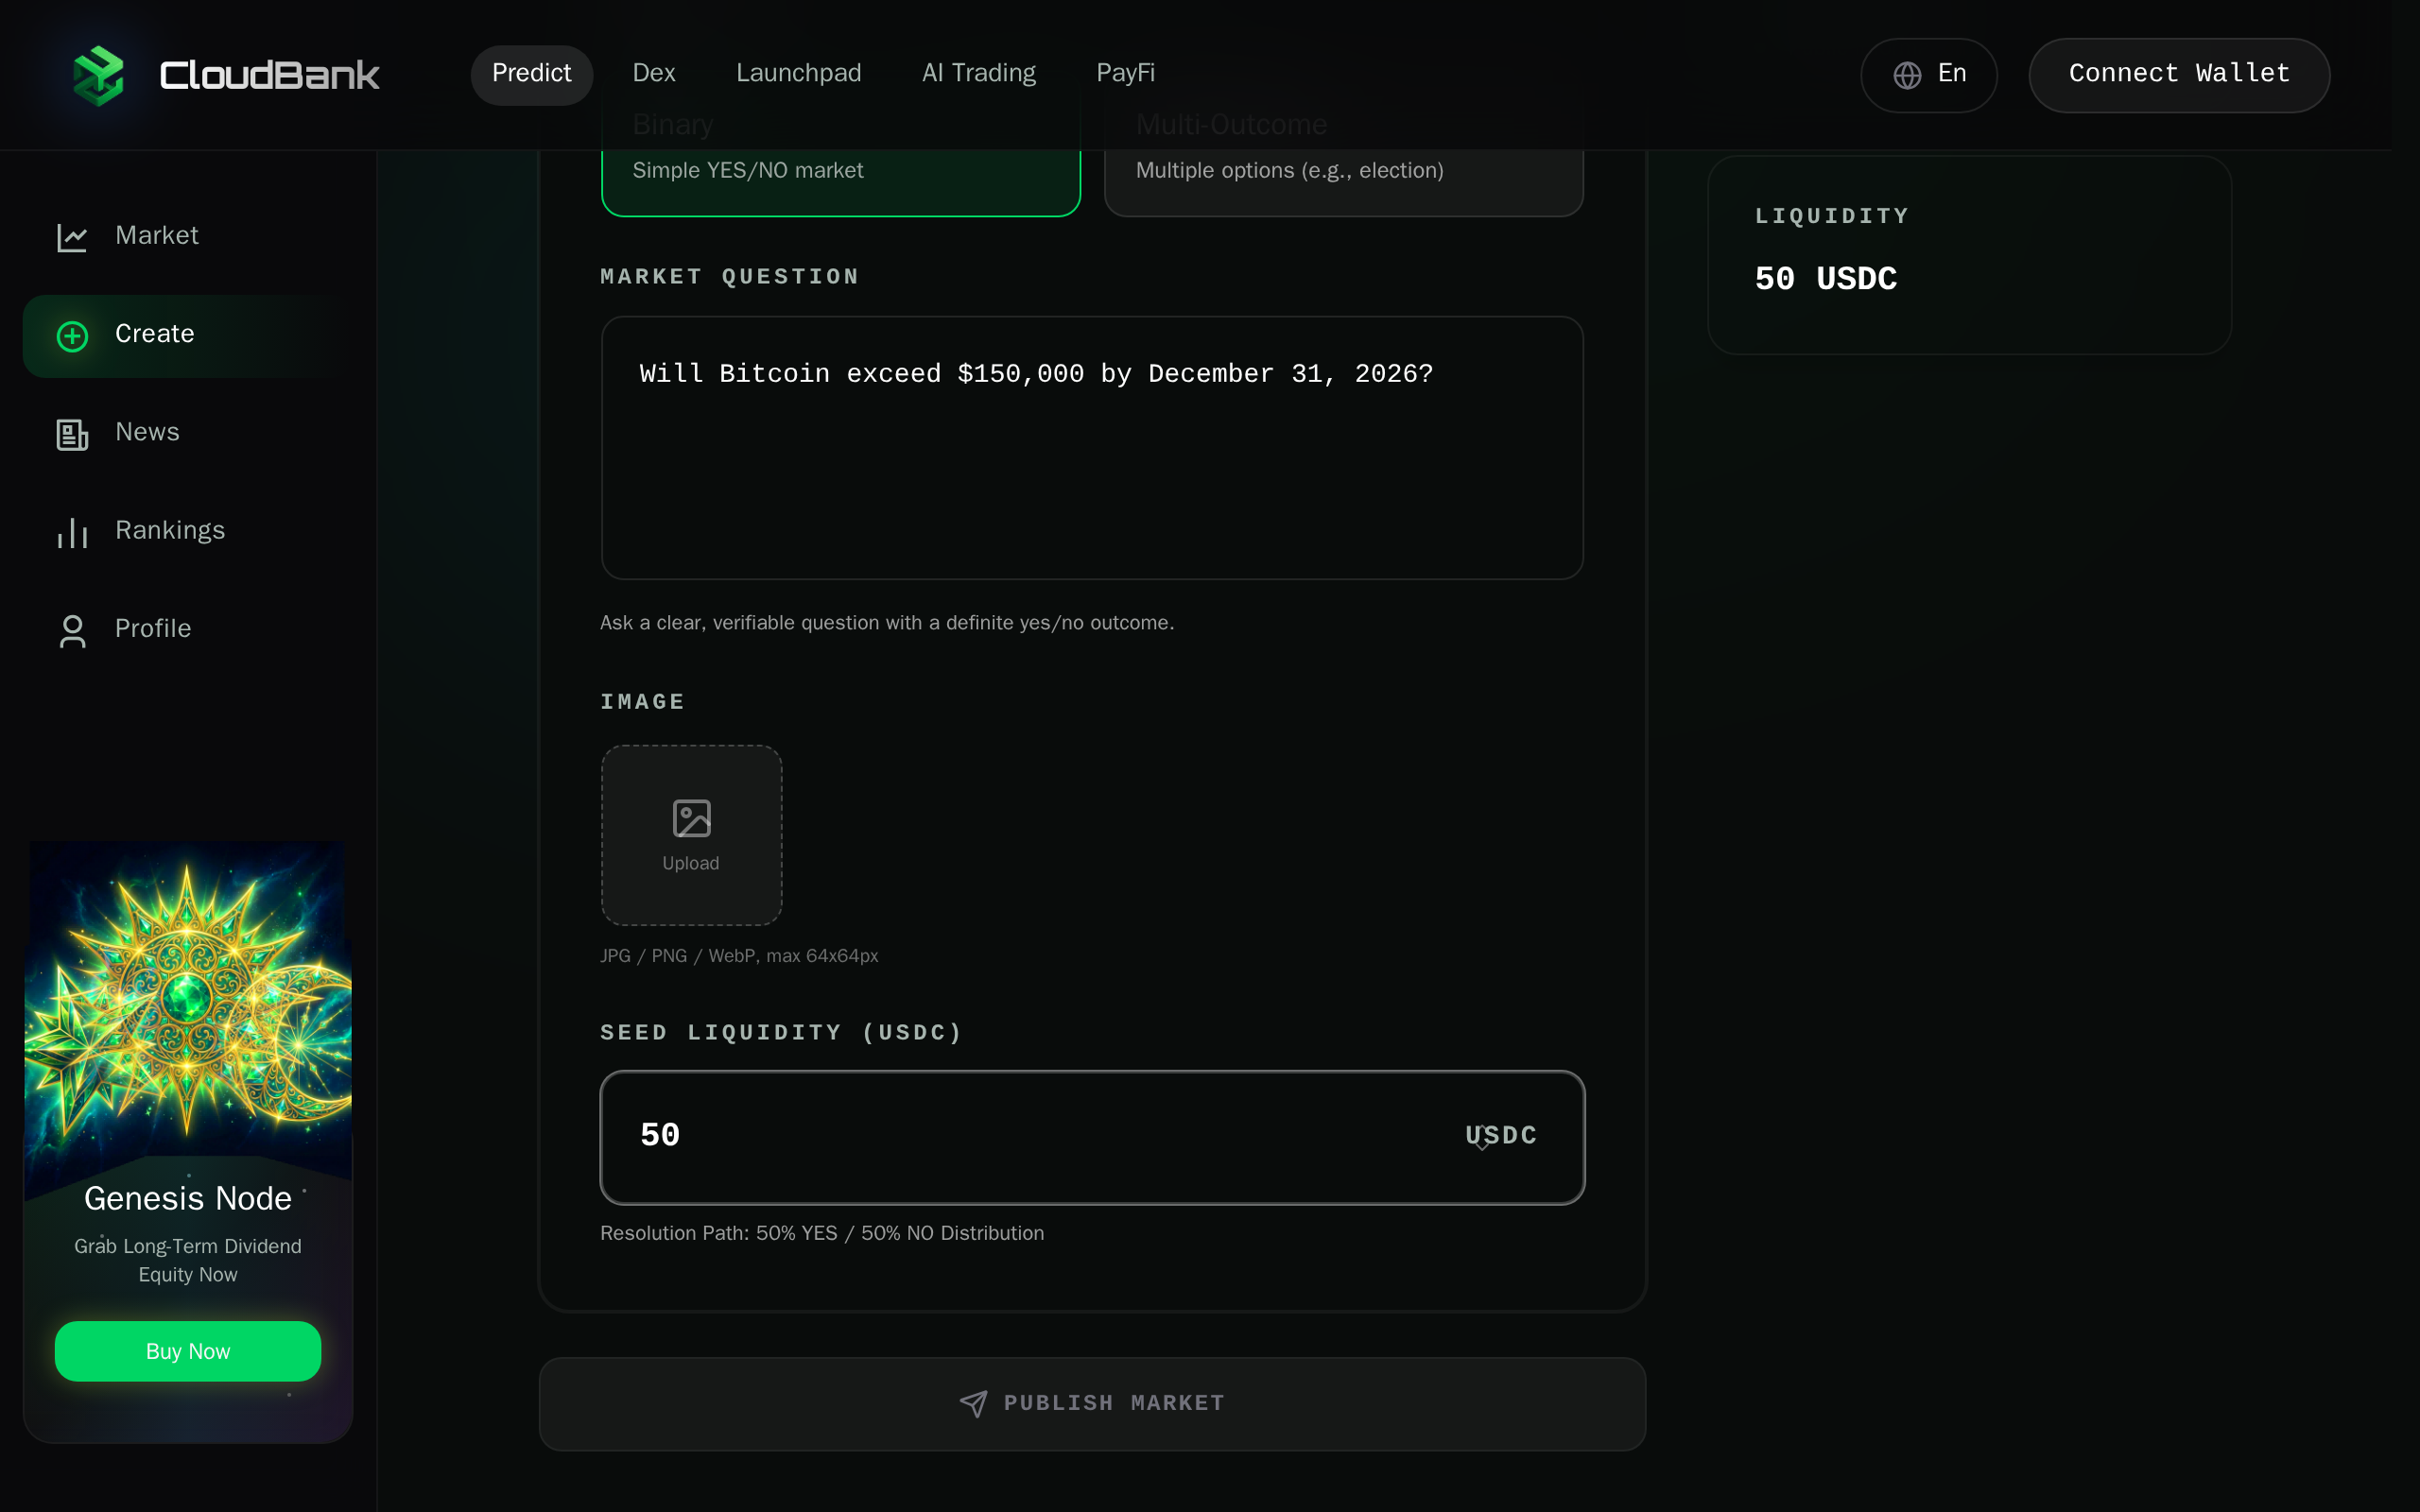
Step 6 — Set Seed Liquidity
Enter the initial liquidity amount in USDC. This seed liquidity determines the starting pool size for trading. The default is 10 USDC.
The Resolution Path below the input shows the initial distribution: 50% YES / 50% NO.
The Liquidity panel on the right updates in real time as you adjust the amount.

Step 7 — Review and Publish
Scroll through the entire form to review all parameters before submitting:
- Market type and question are correct.
- Seed liquidity amount is what you intend.
- Market Protocol quality criteria are satisfied.
Wallet Required
The Publish Market button is only enabled when your wallet is connected. If you see it grayed out, click Connect Wallet in the top-right corner first.
Once your wallet is connected, click Publish Market to submit the on-chain transaction. Wait for the transaction confirmation.
Quality Checklist
Before publishing, verify:
- [ ] Question is objective and verifiable.
- [ ] Resolution source can be checked publicly.
- [ ] Time window is realistic for final data publication.
- [ ] Seed liquidity amount is appropriate.
After Creation
- Verify the market appears in the market list by clicking Market in the sidebar.
- Optionally add more liquidity later.
- Share the market link for trading participation.